In Blogger. It’s great to start blogging with .TK Free Custom Domain. Or to Create an Extra Blog, instead of BlogSpot, one of your custom domain .TK can do a Domain Setup with Blogger. And this is a very easy and good way.

First of all, before starting the Domain Setup, let me tell you one thing. This domain is 1st Year Free. But after this 1st Year Term, you have to give this Domain Name Charge. By using Term By Term Paid, you can also make this domain your own. Charge per year of Normally Domain is between 600 and 1000. You can also use the Lifetime for this domain by paying Per Year.
How to Setup .TK Domain Setup on Blogger Blog
If you already have a blog Which you would like to setup with .TK Domain, you can easily follow the given Easy Step. TK Domain can be setup with your Blogger blog.
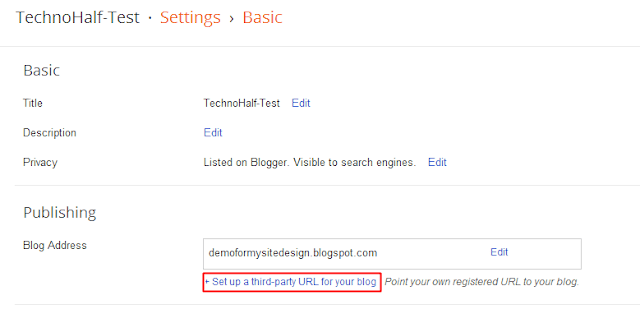
Step 1. Go to Blogger Setting >>> Third Party Domain Setting
Go to Blogger Blog and click on the link to setup the third-party domain.
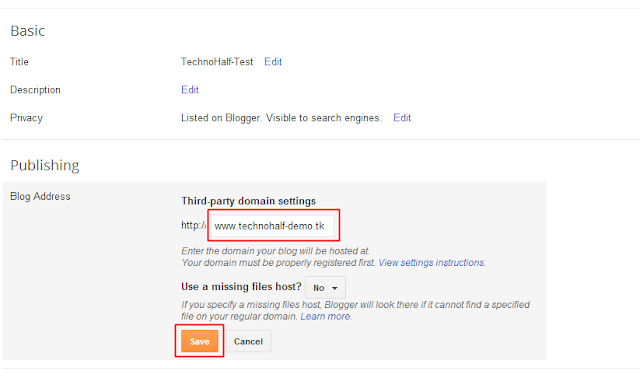
Step 2. Enter your .TK domain with WWW format.
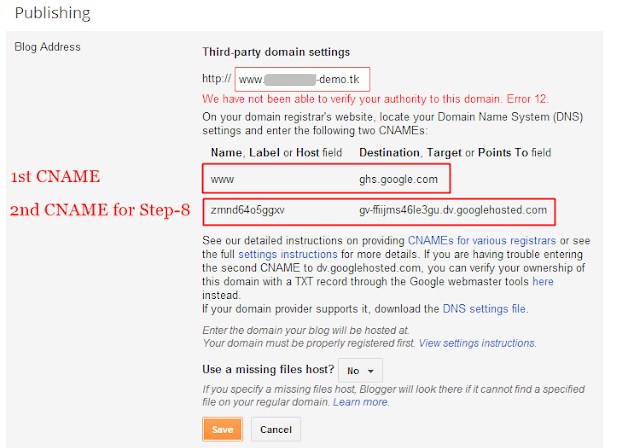
Step 3. Copy Your Blogger Blog DNS
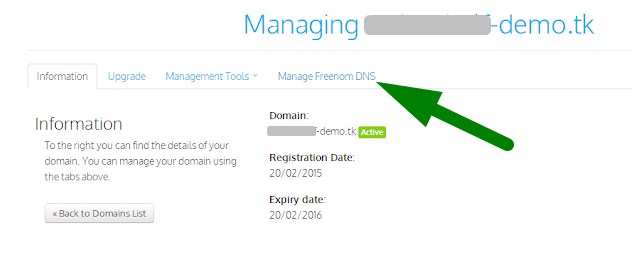
Step 4. Go to Freenom .TK Domain Registrar and Click on DNS Management
Step 5. Add Your cName, Records Here. According to the Steps Below
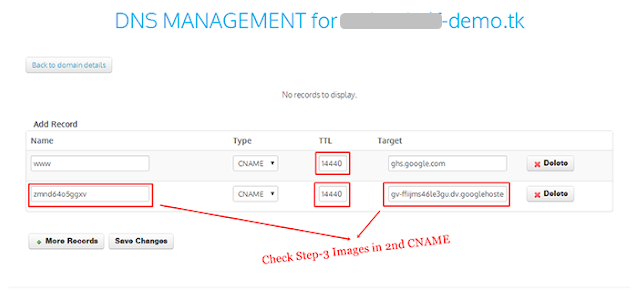
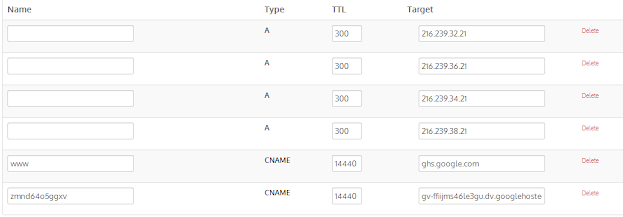
After setting your blog’s DNS to Freenom, click Save Button. In a few minutes, the domain name will be linked with your hosting blog, after that, click the redirect to WWW and save it.
Also Read:
- How to Redirect BlogSpot Blog to Another Blog (Simple Trick)
- How to Verify Domain on New Search Console [2019]
- How to Setup CloudFlare on Your Website/Blog (Just 5 Minutes)
In these few steps, your .TK Domain will be immediately connected with your blog. But do not forget to remember the blog to redirect to the WWW. If you do not do this then you will not have to face any error, so that’s the Batter, following Step 6, redirect your blog with the WWW format. You can start Work in your blog immediately after the Domain Setup is completed. And your .blogspot.com subdomain will also be redirected from your custom domain ie .TK domain itself.


